
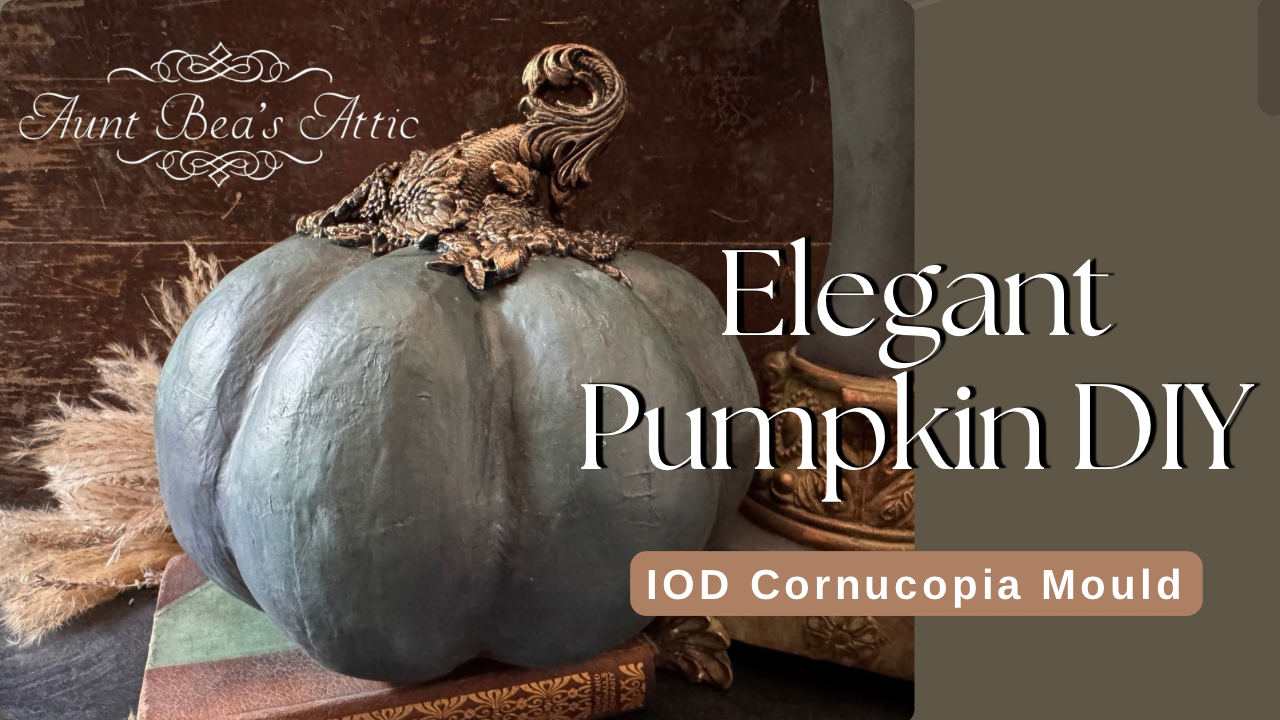
Have you ever looked at a mould and imagined using it in a completely unexpected way? When I saw a beautiful pumpkin stem in the IOD Cornucopias Mould, I immediately knew I wanted to use it to dress up a simple papier-mâché pumpkin I already had on hand.
By layering IOD Air Dry Clay castings and building them around the original stem, I turned an inexpensive pumpkin into an elegant piece of fall décor filled with rich color, texture, and metallic detail. The finished stem may look intricate, but the forgiving layered design makes this a wonderfully creative project—even when every casting does not fit perfectly at first.
Supplies Used
-
Titebond Quick & Thick
Additional Basic Supplies
-
Papier-mâché pumpkin
-
White paint for the base coat - I used Paint Couture Simply White
-
Paintbrushes
-
Water mister
-
Paper towels or a soft cloth for dabbing and wiping back paint
-
Craft knife or scissors for reshaping the original stem
Step 1: Reshape the Existing Pumpkin Stem
I began by reshaping the pumpkin’s original stem so the moulded pieces would fit around it. This did not need to look pretty because the original stem would eventually be hidden.
I carefully cut and squeezed it until I had a smaller shape that could serve as the base for the new decorative stem.

Step 2: Cast the IOD Cornucopias Mould Pieces
I cast the pieces with IOD Air Dry Clay, beginning with the large swirl from the Cornucopias Mould. I knew this piece would become the main part of the stem, so I positioned it first and planned the rest of the design around it.
From there, I chose additional leaves, vines, and decorative pieces from the mould to add texture and movement.
One of the best things about this design is that the castings do not need to fit together perfectly. Overlapping the pieces helps disguise gaps and makes the separate castings look like one beautifully detailed stem.
Step 3: Build and Attach the Decorative Stem
I attached each clay casting with Titebond Quick & Thick. I layered the smaller pieces around the main swirl, adding foliage anywhere the stem needed more fullness or texture.
As I worked my way around the pumpkin, I overlapped pieces and adjusted the arrangement until everything flowed together naturally. I loved the design more with every piece I added.
Creative tip: Let the foliage extend slightly onto the pumpkin. This helps the stem and pumpkin look like one cohesive piece instead of separate parts.

Step 4: Apply a White Base Coat
Once the initial mouldings were attached, I painted the entire pumpkin and stem white. Bringing everything into one color made it much easier to see the texture and overall shape of the design.
After looking at it in white, I added a few more layers of foliage until the stem felt complete.

Step 5: Layer the Blue-Gray Pumpkin Colors
For the pumpkin’s main color, I used Paint Couture Carbon, a beautiful blue-gray shade. I then layered in Paint Couture Evergreen and Abyss, allowing the colors to blend together in some areas.
I did not want the finish to look too smooth or perfect. The slight variation between the blue, green, and darker tones gave the pumpkin much more depth and character. I also added Admiral Blue for another layer of dimension.
Work in sections and allow some colors to remain more visible than others. The goal is not to create one flat color—it is to build an aged, artistic finish with natural variation.

Step 6: Paint the Stem with Black Pearl
I painted the entire decorative stem with Paint Couture Black Pearl Lux Metallic. Honestly, I loved how it looked at this stage and spent some time deciding which color I wanted to use to highlight all the beautiful details.
The dark metallic base created contrast in the recessed areas and gave me the perfect foundation for the final copper highlights.

Step 7: Deepen the Pumpkin’s Grooves
Before finishing the stem, I went back to deepen the grooves in the pumpkin. I used Paint Couture Autumn Sage, Baltic Black, and even a little Purple Haze.
I brushed the colors into the grooves, lightly misted the surface with water, and then dabbed some of the paint back. This allowed the colors to settle naturally into the recessed areas and created a beautifully layered texture.
I also added a few lighter areas, brushing on color and wiping it back until the balance looked right. This is a very forgiving process—continue layering and removing small amounts of paint until you love the finish.
Step 8: Highlight the Stem with Copper
For the finishing touch, I chose Paint Couture Copper to highlight the raised details on the Cornicopia stem. As soon as I brushed it over the texture, I knew it was the right choice.
The copper made every leaf, curl, and ridge stand out against the Black Pearl base. It gave the pumpkin an elegant metallic finish and brought the entire project together.

The Finished Elegant Fall Pumpkin
What began as a plain papier-mâché pumpkin became a rich, elegant piece of fall décor with an ornate sculpted stem. I especially love how the cool blue-gray pumpkin contrasts with the warm copper details.
This project is also a great reminder to look beyond the most obvious use for each IOD Mould. A few individual pieces can be layered and combined to create something completely new.


Would you try this unexpected use of the IOD Cornucopias Mould? Let us know in the comments, and be sure to subscribe to the Aunt Bea’s Attic YouTube channel for more furniture painting, moulding, and seasonal DIY inspiration.
Ready to make your own? SHOP THE SUPPLIES USED IN THIS PROJECT